If you’ve been searching for a simple way to preserve fresh okra while creating a tangy, crunchy snack, this pickled okra recipe easy method is exactly what you need.
Pickling okra transforms this Southern staple into a zesty treat that’s perfect for munching straight from the jar, adding to Bloody Marys, or serving alongside sandwiches and cheese plates.
The best part? You don’t need any special canning equipment or complicated techniques to achieve restaurant-quality results right in your own kitchen.
Why You’ll Love This Pickled Okra Recipe Easy
This recipe takes all the guesswork out of pickling, making it accessible even if you’ve never preserved vegetables before. Unlike traditional canning methods that require water baths and pressure cookers, this refrigerator pickling technique is quick, safe, and foolproof.
You’ll appreciate how the tangy brine perfectly balances the okra’s mild flavor while maintaining that satisfying crunch we all love in a good pickle.
Ingredients for Pickled Okra Recipe Easy
| Ingredient | Amount |
|---|---|
| Fresh okra pods (small to medium) | 1 pound |
| White vinegar | 2 cups |
| Water | 1 cup |
| Kosher salt | 3 tablespoons |
| Garlic cloves, peeled | 6 cloves |
| Fresh dill sprigs | 4-6 sprigs |
| Red pepper flakes | 1 teaspoon |
| Black peppercorns | 1 teaspoon |
| Mustard seeds | 1 teaspoon |
How To Make Pickled Okra Recipe Easy
Prepare the okra: Wash the okra pods thoroughly under cold running water and pat them completely dry with a clean kitchen towel. Trim just the very tip of the stem end without cutting into the pod itself, as this prevents the okra from becoming slimy during pickling.
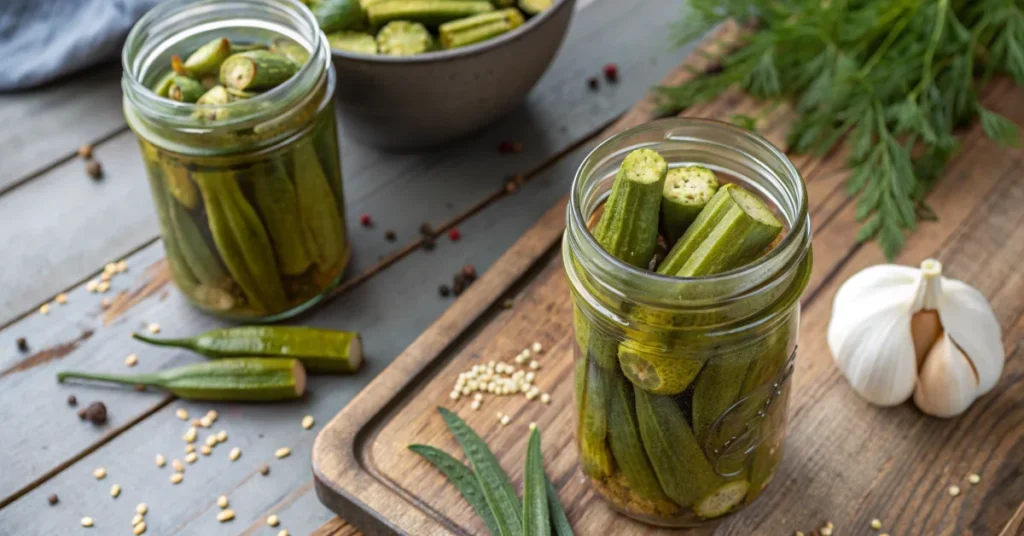
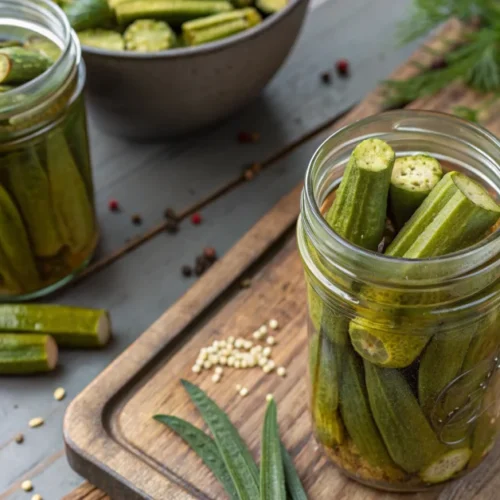
Sterilize jars: Wash two pint-sized mason jars and their lids with hot, soapy water, then rinse well. You can also run them through the dishwasher for extra cleanliness. Make sure the jars are completely dry before packing.
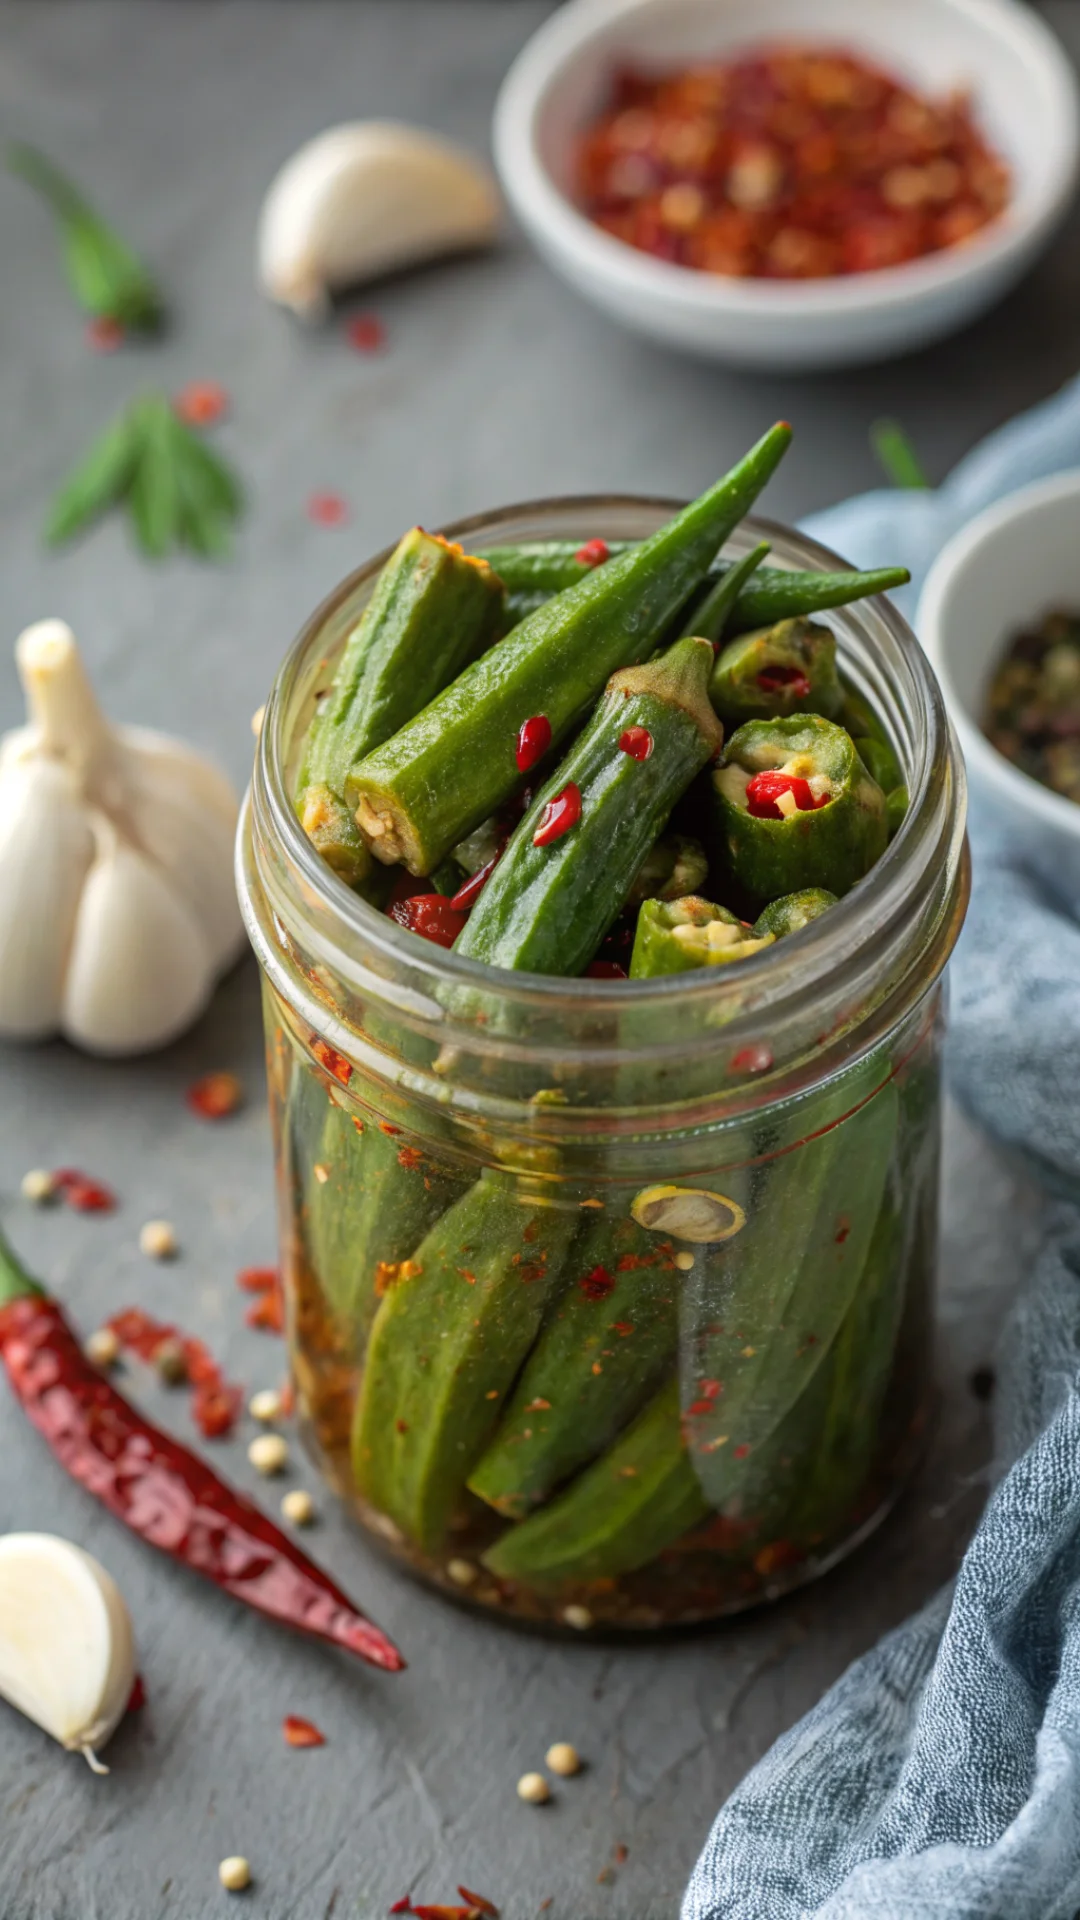
Pack the jars: Divide the garlic cloves, dill sprigs, red pepper flakes, peppercorns, and mustard seeds evenly between the two jars. Stand the okra pods upright in the jars, packing them tightly but not crushing them. They should fit snugly to prevent floating.
Make the brine: In a medium saucepan, combine the white vinegar, water, and kosher salt. Bring the mixture to a rolling boil over high heat, stirring occasionally to dissolve the salt completely. Once boiling, remove from heat immediately.
Pour the brine: Carefully pour the hot brine over the okra in each jar, leaving about half an inch of headspace at the top. Use a clean spoon or chopstick to release any air bubbles trapped between the okra pods by gently pressing down and sliding along the sides.
Seal and cool: Wipe the rims of the jars with a clean, damp cloth to remove any brine or residue. Place the lids on the jars and screw the bands on fingertip-tight. Allow the jars to cool to room temperature on the counter, which should take about 1-2 hours.
Refrigerate: Once cooled, transfer the jars to the refrigerator. Let them pickle for at least 24 hours before eating, though they’ll taste even better after 2-3 days when the flavors have fully developed.
Tips and Tricks
Choose the right okra: Select firm, bright green okra pods that are 3-4 inches long for the best texture. Avoid large, mature pods as they tend to be tough and woody even after pickling.
Keep it crispy: The key to crunchy pickled okra is using fresh, young pods and pouring the brine while it’s still hot. This quick heat exposure helps set the texture without overcooking.
Adjust the heat level: Feel free to increase or decrease the red pepper flakes based on your preference. For mild pickles, omit them entirely, or add a whole dried chili pepper for extra kick.
Storage duration: These refrigerator pickles will keep for up to 2 months when stored properly in the fridge. Always use clean utensils when removing okra to prevent contamination.
Vinegar options: While white vinegar gives the cleanest flavor, you can substitute apple cider vinegar for a slightly sweeter, more complex taste profile.
Reuse the brine: Don’t discard the leftover pickling liquid! Use it in salad dressings, marinades, or even as a flavorful addition to cocktails and Bloody Marys.
Delicious Variations to Try
Once you’ve mastered the basic pickled okra recipe, experiment with different flavor combinations to create your own signature blend.
Try adding a cinnamon stick and a few whole cloves for a warm, spiced version that’s particularly delicious during fall.
You can also include sliced jalapeños or habanero peppers for a fiery kick that pairs beautifully with the okra’s natural flavor. Some people love adding a tablespoon of sugar to the brine for sweet and sour pickles that appeal to those who prefer less acidic flavors.
Frequently Asked Questions
Can I use frozen okra for this recipe?
While fresh okra is strongly recommended for the best texture and crunch, you can use frozen okra in a pinch. However, thaw it completely and pat it very dry before pickling. Be aware that frozen okra may result in slightly softer pickles since freezing breaks down some of the cell structure.
Do I need to process these jars in a water bath?
No, this is a refrigerator pickle recipe that doesn’t require water bath canning. The pickles must be stored in the refrigerator at all times and will last up to 2 months. If you want shelf-stable pickled okra, you’ll need to follow proper canning procedures with sterilized jars and a boiling water bath for 10 minutes, though refrigerator pickling is much simpler for beginners.
Why is my pickled okra slimy?
Sliminess usually occurs when the okra pods are cut too deeply or punctured during preparation, which releases their natural mucilage. To prevent this, trim only the very tip of the stem without cutting into the pod itself. Using very hot brine and choosing young, fresh okra also helps maintain crispness and reduces slime.
Final Thoughts
This easy pickled okra recipe proves that preserving vegetables doesn’t have to be complicated or time-consuming. With just a handful of ingredients and minimal effort, you can create delicious, tangy pickles that rival any store-bought version.
Whether you’re a seasoned pickler or complete beginner, this foolproof method delivers consistently excellent results every time.
Give it a try with your next batch of fresh okra, and discover why pickled okra has been a beloved Southern tradition for generations.
Easy Pickled Okra
Ingredients
- 1 pound fresh okra pods small to medium size
- 2 cups white vinegar
- 1 cup water
- 3 tablespoons kosher salt
- 6 cloves garlic peeled
- 4-6 sprigs fresh dill
- 1 teaspoon red pepper flakes
- 1 teaspoon black peppercorns
- 1 teaspoon mustard seeds
Instructions
- Wash okra thoroughly, pat dry, and trim just the tip of the stem end without cutting into the pod.
- Wash and dry two pint-sized mason jars and lids thoroughly.
- Divide garlic, dill, red pepper flakes, peppercorns, and mustard seeds between jars. Pack okra upright tightly in jars.
- Combine vinegar, water, and salt in a saucepan. Bring to a rolling boil, stirring to dissolve salt. Remove from heat.
- Pour hot brine over okra, leaving 1/2 inch headspace. Remove air bubbles with a clean spoon.
- Wipe jar rims clean, seal with lids, and let cool to room temperature.
- Refrigerate for at least 24 hours before eating. Best after 2-3 days.